
Using the Web Interface
The web interface calls environments previews. The API, CLI, and URLs still use composition for the same resource. Preparation drafts, server plans, and structured diagnosis were merged after v0.8.0 and require a newer source build until a release includes them.
This walkthrough uses the Slate and teal theme with Demo simulation enabled. Screenshots illustrate the core flow; message-isolation controls require the operator setup described below. Names, URLs, readiness, and expiry times in the screenshots are sample data; no cluster resources were created. Select a screenshot to open it at full size.
Open the dashboard
Section titled “Open the dashboard”The released Envy image includes the dashboard. After installing with Helm, use your team’s Envy URL or the guide’s port-forward at http://localhost:8081. You do not need to install the CLI or run a separate frontend server.
To look around with sample data, select Explore demo on the login screen. Once inside the workspace, the simulation switch is under Installation → Demo. You can also follow the screenshots below without installing anything.
Live installations use their configured login mode: local dev opens as Admin, password mode shows a username/password form, and Google mode shows Continue with Google. Browser tokens and server URLs are no longer entered manually. The signed-in identity and Sign out / Sign out everywhere controls appear under Installation.
To configure login for your installation, follow Authentication & Google Sign-in.
Turn off Demo simulation when you want to work with the live API. The simulator does not deploy workloads or provide working preview endpoints; live diagnostics and revision history require a connected installation. Frontend contributors can run the simulation from source without a cluster.
Onboard your application
Section titled “Onboard your application”In Live Mode, choose Applications → Onboard application. Describe the existing baseline, choose deployment-derived or manual HTTP profiles, validate, and explicitly register. Then discover and approve any deployment-derived services before opening the preview creation flow. See the guided onboarding walkthrough for fields, permissions, and verification semantics.
Registration saves the baseline without creating workloads. Resume saved setup from Prepare overrides on its Applications card. During the first two onboarding steps, Save preparation stores non-secret fields for Load saved preparation after a reload; environment values must be re-entered. Unsaved edits are discarded when you leave onboarding. The JSON editor remains under Advanced registration.
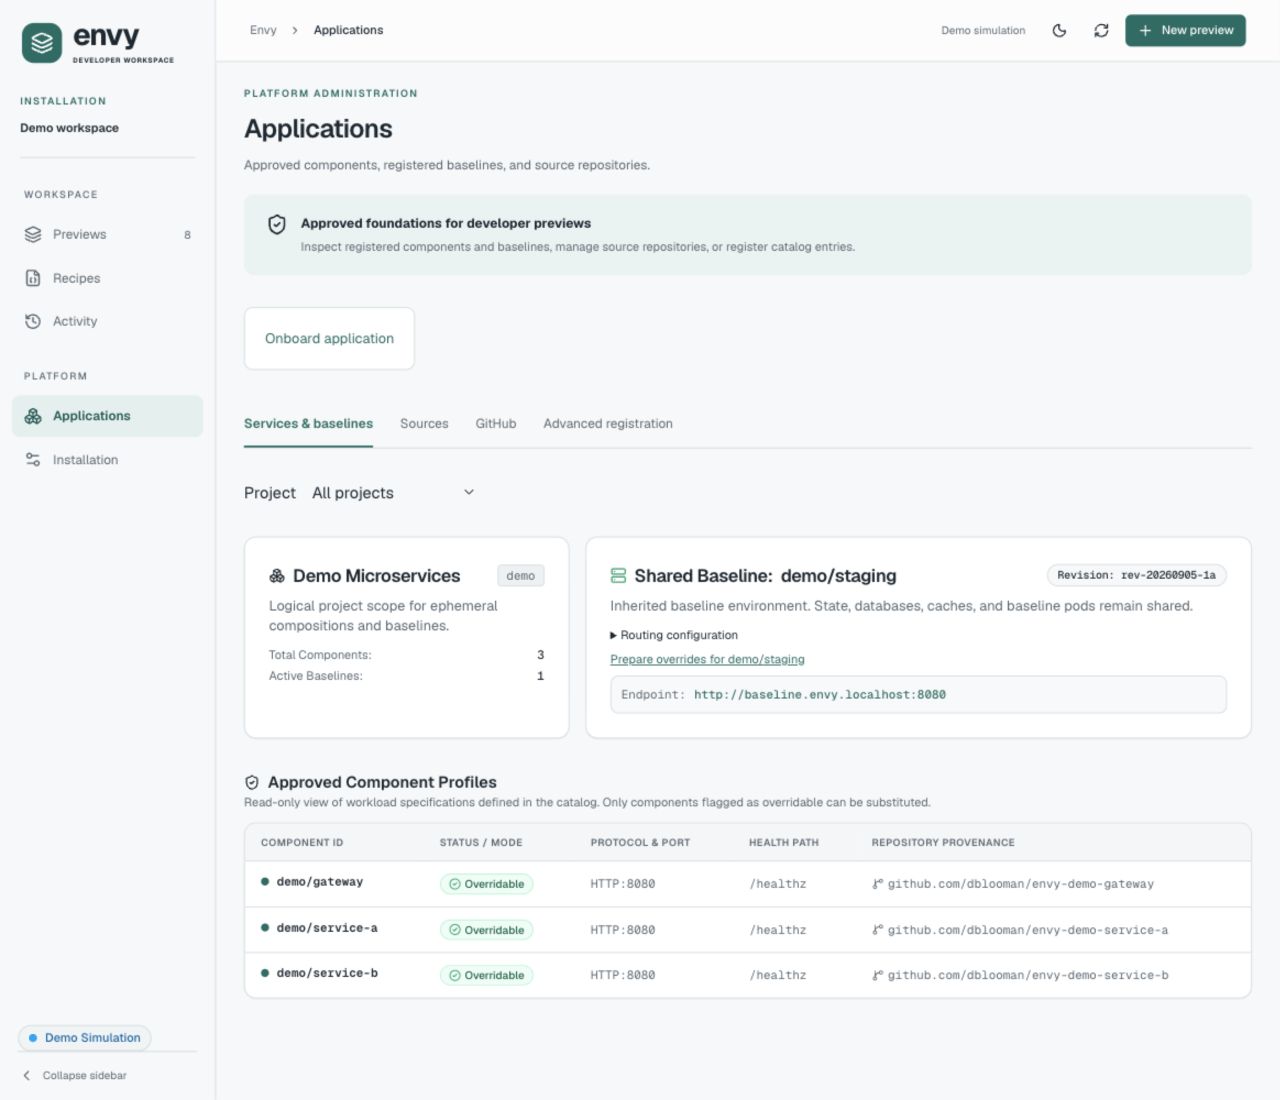
The screenshot shows where onboarding starts; opening the wizard requires Live Mode.
Find and open a preview
Section titled “Find and open a preview”Select Previews in the workspace navigation.
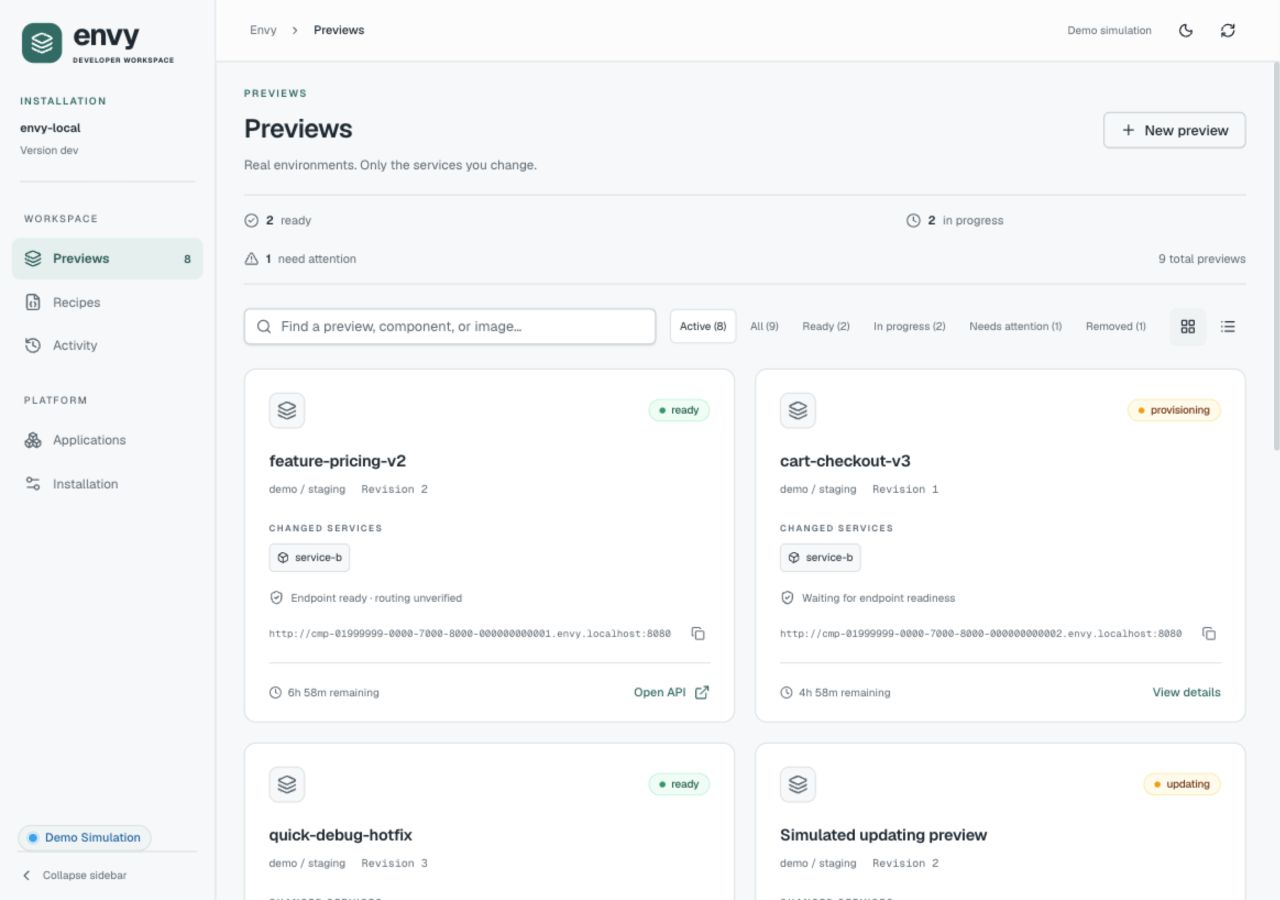
- Search by preview name, component, or image. Use Ready, In progress, or Needs attention to narrow the list; All also includes terminated previews.
- Read the changed services, readiness message, and remaining lifetime on each card. Use the layout buttons to switch between cards and rows.
- Select a preview name to inspect it. Select Open API to visit its endpoint, or copy the URL to share it with a teammate who has access.
Endpoint ready · routing unverified means endpoint readiness has been reported, but request routing and context propagation have not been verified. Do not treat endpoint reachability as proof that every request reached the intended overridden services.
Create a preview
Section titled “Create a preview”Select New preview from the preview list or the Applications toolbar. The configuration summary follows your choices through all three steps.
1. Choose baseline
Section titled “1. Choose baseline”Enter a recognizable name such as pricing-review, then choose your project and baseline. The baseline provides the services you leave unchanged; staging is the demo’s baseline name, not a required naming convention.
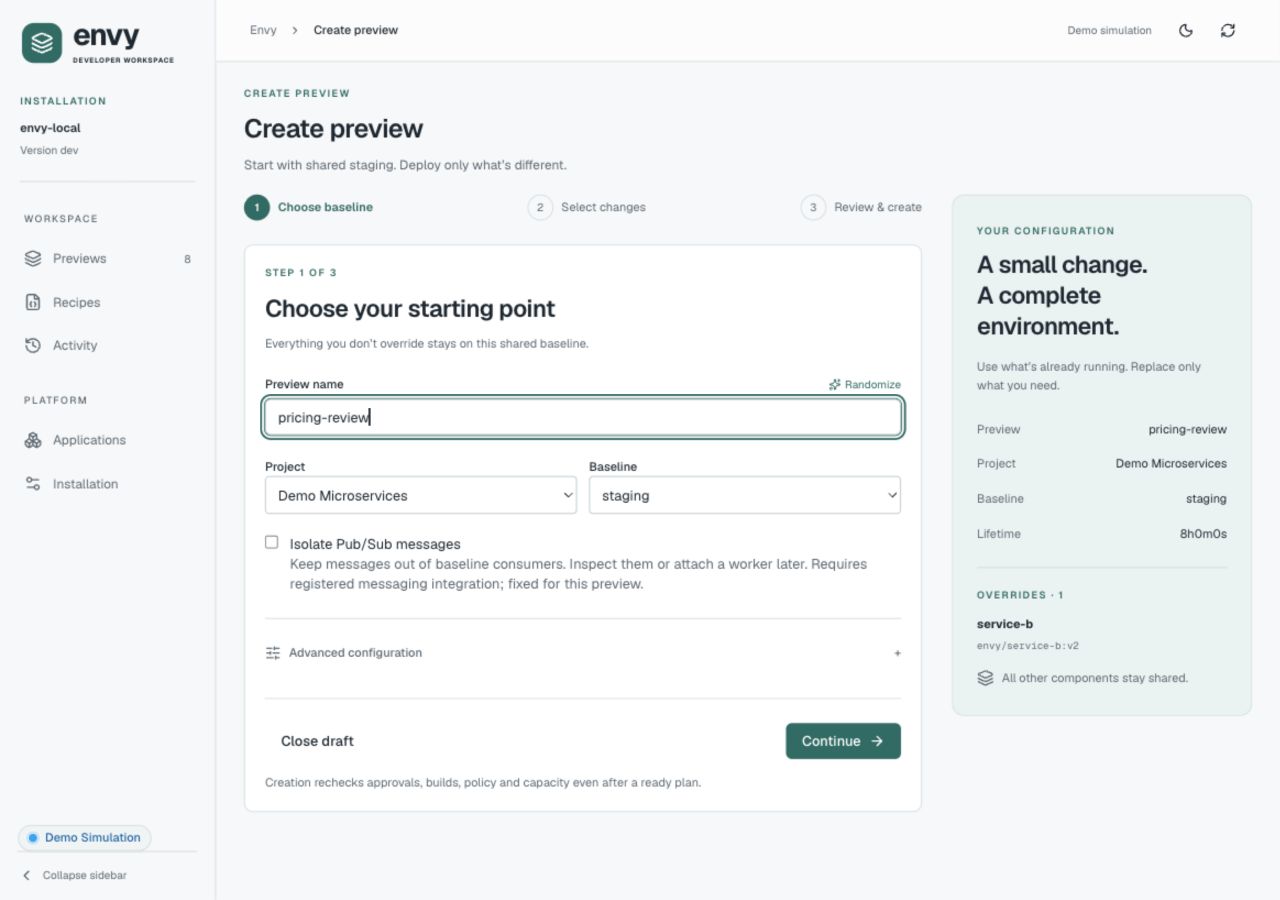
Select Isolate Pub/Sub messages only after completing Google Pub/Sub setup. The choice is fixed for this preview and does not require a consumer override. Expand Advanced configuration if you need to adjust the preview lifetime or other optional settings. Otherwise keep the installation defaults and select Continue.
2. Select changes
Section titled “2. Select changes”Select the components to override and choose their versions. In this example, service-b uses envy/service-b:v2; gateway and service-a stay on the shared baseline.
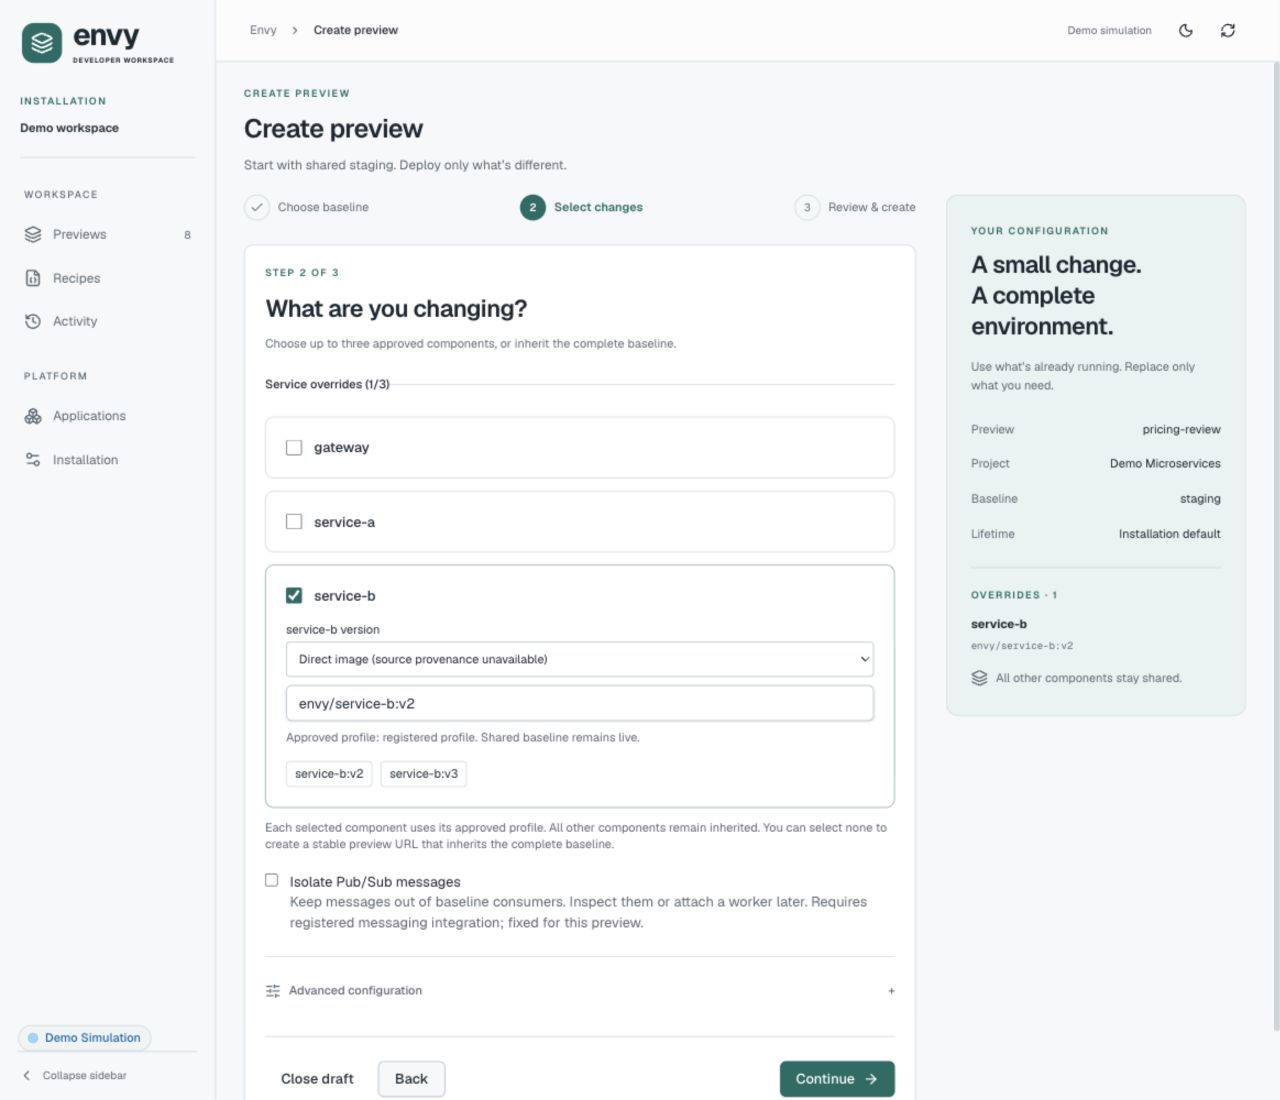
You can select up to three components, or select none to inherit the complete baseline. In a configured live installation, you can choose published Git builds when available. Direct images do not provide source provenance. Select Continue after reviewing your choices.
3. Review and create
Section titled “3. Review and create”Check the name, baseline, service versions, and lifetime in the summary. In Live Mode, the server plan also shows selected and inherited workloads, approved revisions, destination, resource estimate, and any blocker with a next action. Refresh it after changing a selection. Demo simulation shows the summary without a live server plan. Planning reserves no capacity; Envy checks the contract again at creation. Use Back to correct a choice, then select Create preview to submit it.
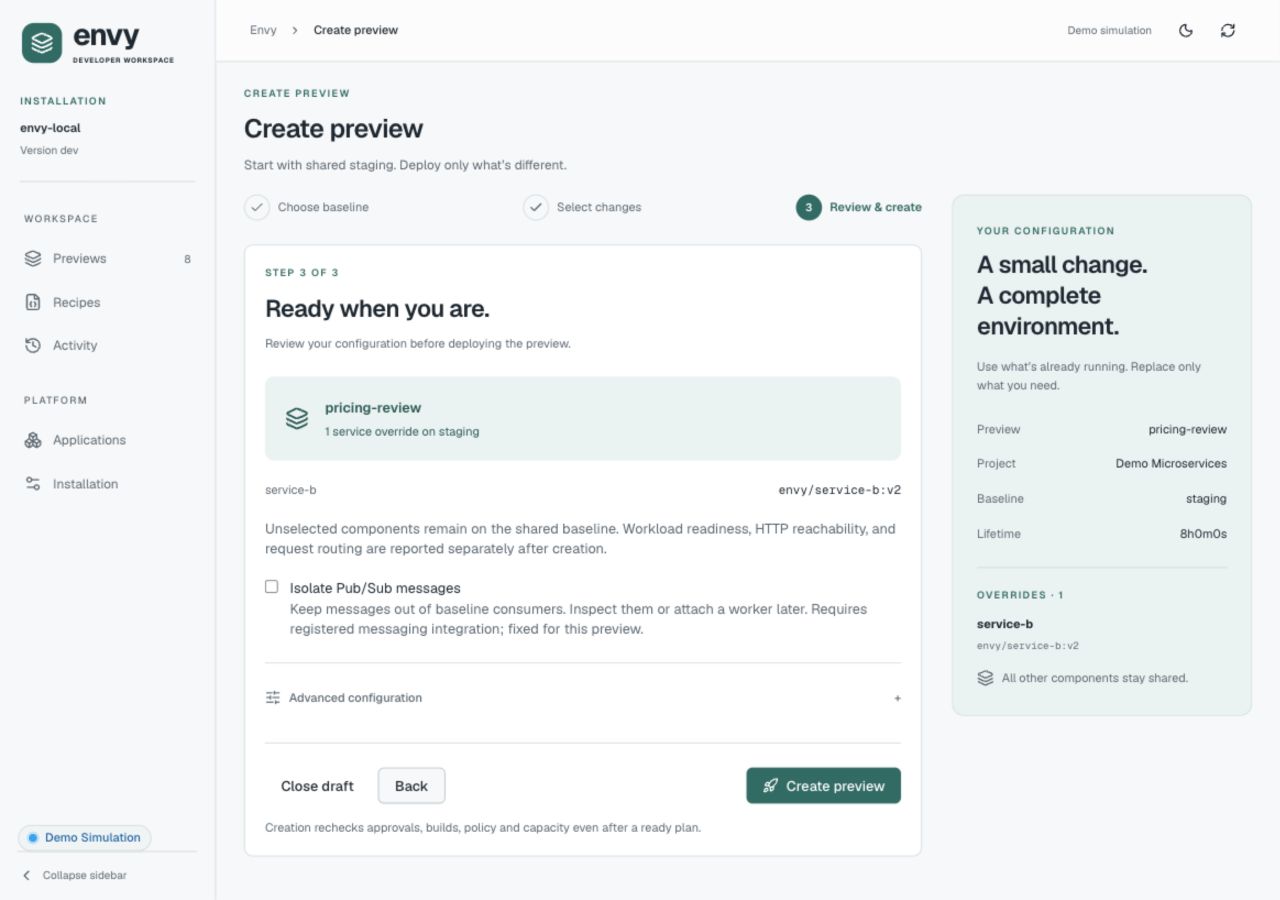
In Live Mode, submission creates a composition and starts provisioning. Follow its status before opening the endpoint. Your unfinished draft remains in the current tab while you navigate, but reloading clears it.
Inspect a preview
Section titled “Inspect a preview”Select a preview name from the list to open its workspace.
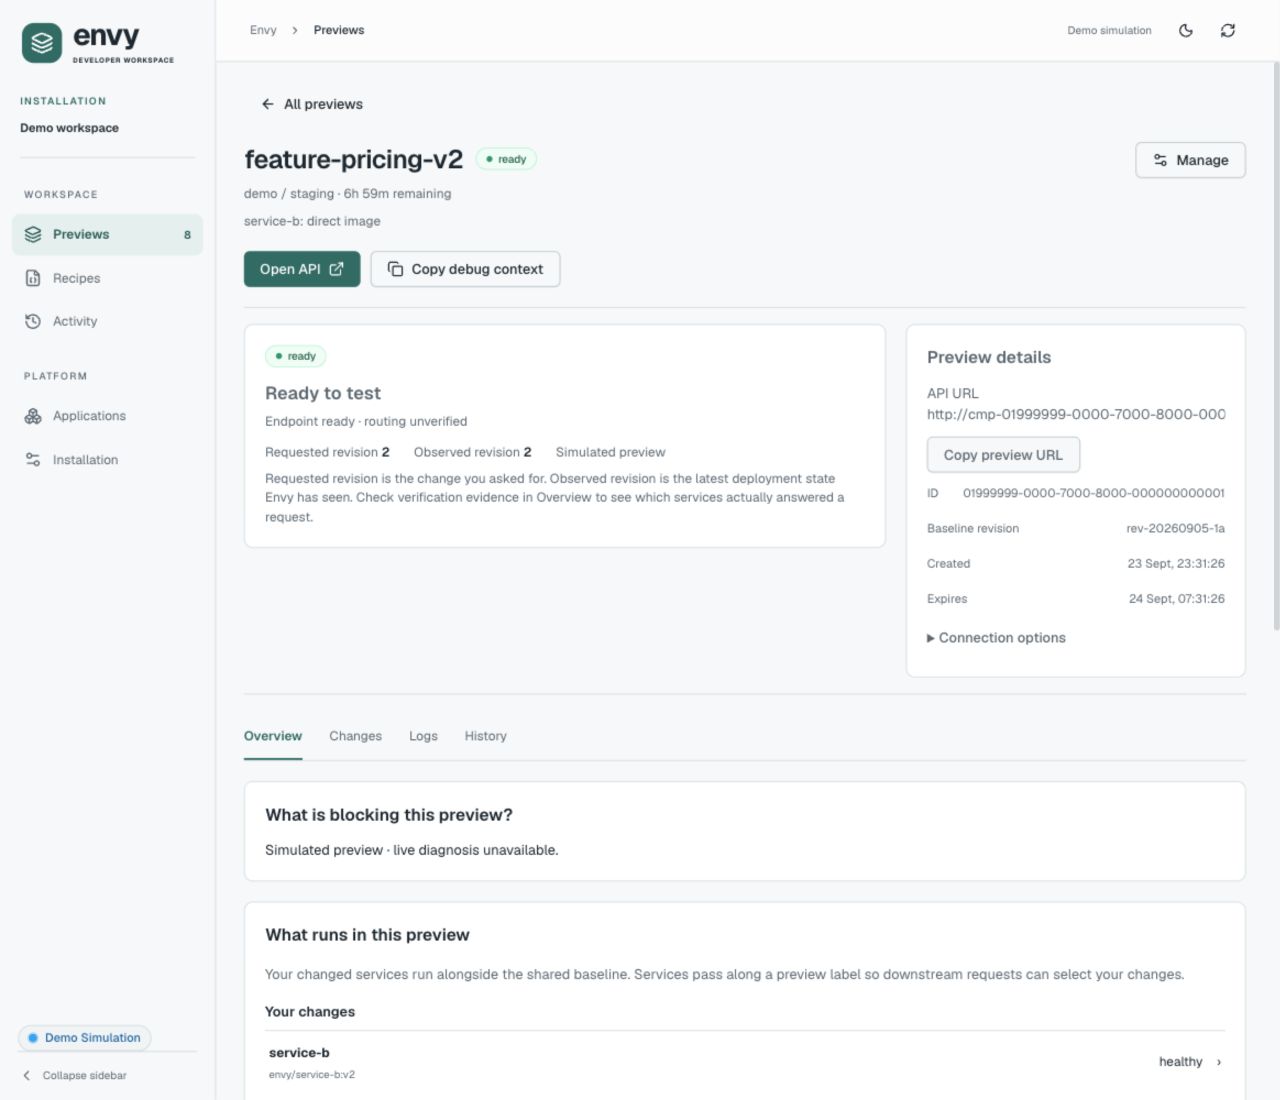
The detail page separates four tasks:
| Section | Use it to |
|---|---|
| Overview | Open or copy the endpoint, check expiry and generation, inspect shared and overridden services, and read the current diagnosis and verification evidence. Frontend bindings are separate from backend readiness. |
| Changes | Inspect source revisions, image artifacts, and desired-state changes. |
| Logs | Inspect bounded application logs and supported live diagnostics. Inherited logs may include traffic from other previews. |
| History | Review actor requests and durable lifecycle events. |
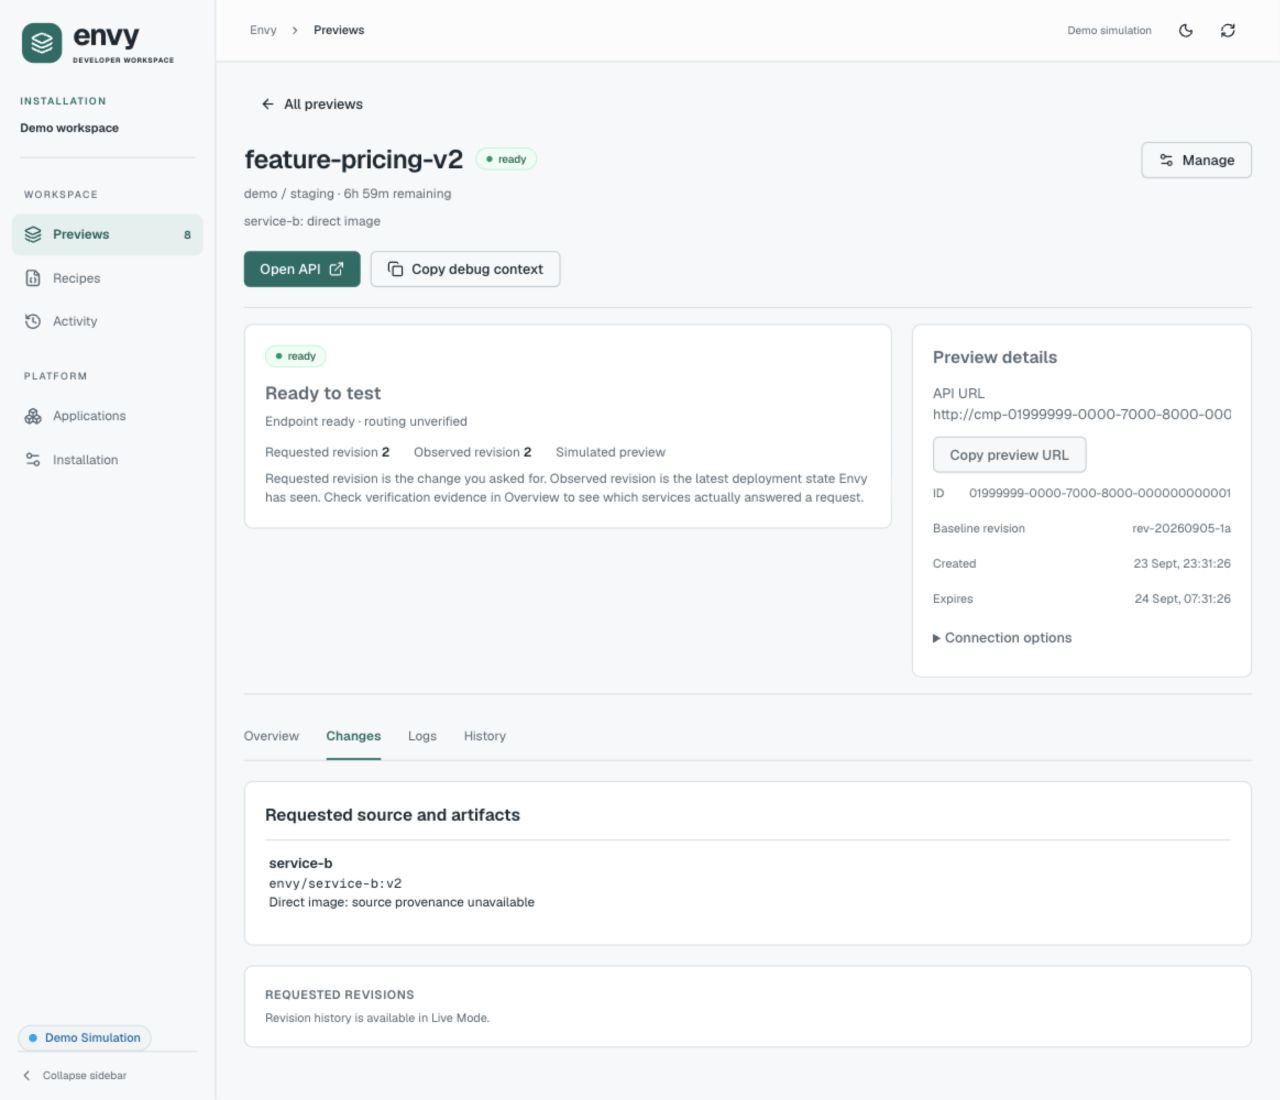
The demo labels unavailable live evidence explicitly. An image reference alone does not establish the source commit or verified routing.
For a preview that is failing or taking too long, start with the diagnosis on Overview, then correlate its findings with Logs, History, and the selected images in Changes. Verification evidence can be current, stale, failed, unavailable, or of unknown coverage; a passed HTTP check establishes reachability, not every downstream route. See Diagnostics & Error Codes for troubleshooting and Routing & Ingress Contract for verification semantics.
Update, clean up, and configure
Section titled “Update, clean up, and configure”- Update preview changes an existing preview’s selected revisions and override membership, including returning all services to baseline inheritance. It keeps the URL and original expiry. After submitting an update, follow the new generation and readiness before testing again.
- Destroy removes the preview when testing is complete. Check the preview name in the confirmation before proceeding; the shared baseline remains available.
- Applications groups catalog information, sources, and registration under platform administration.
- Installation separates read-only server configuration, browser appearance preferences, and local development connections.
Everyday preview work stays under Workspace in the navigation; platform configuration stays under Platform.
For label-driven PR environments, use Applications → Sources to discover installed GitHub repositories and Applications → GitHub to configure policies, inspect webhook health, and stop or restart previews. See GitHub App & PR Previews for permissions and setup. App-owned previews update automatically; generic updates are blocked, and destroying one also stops its automation.